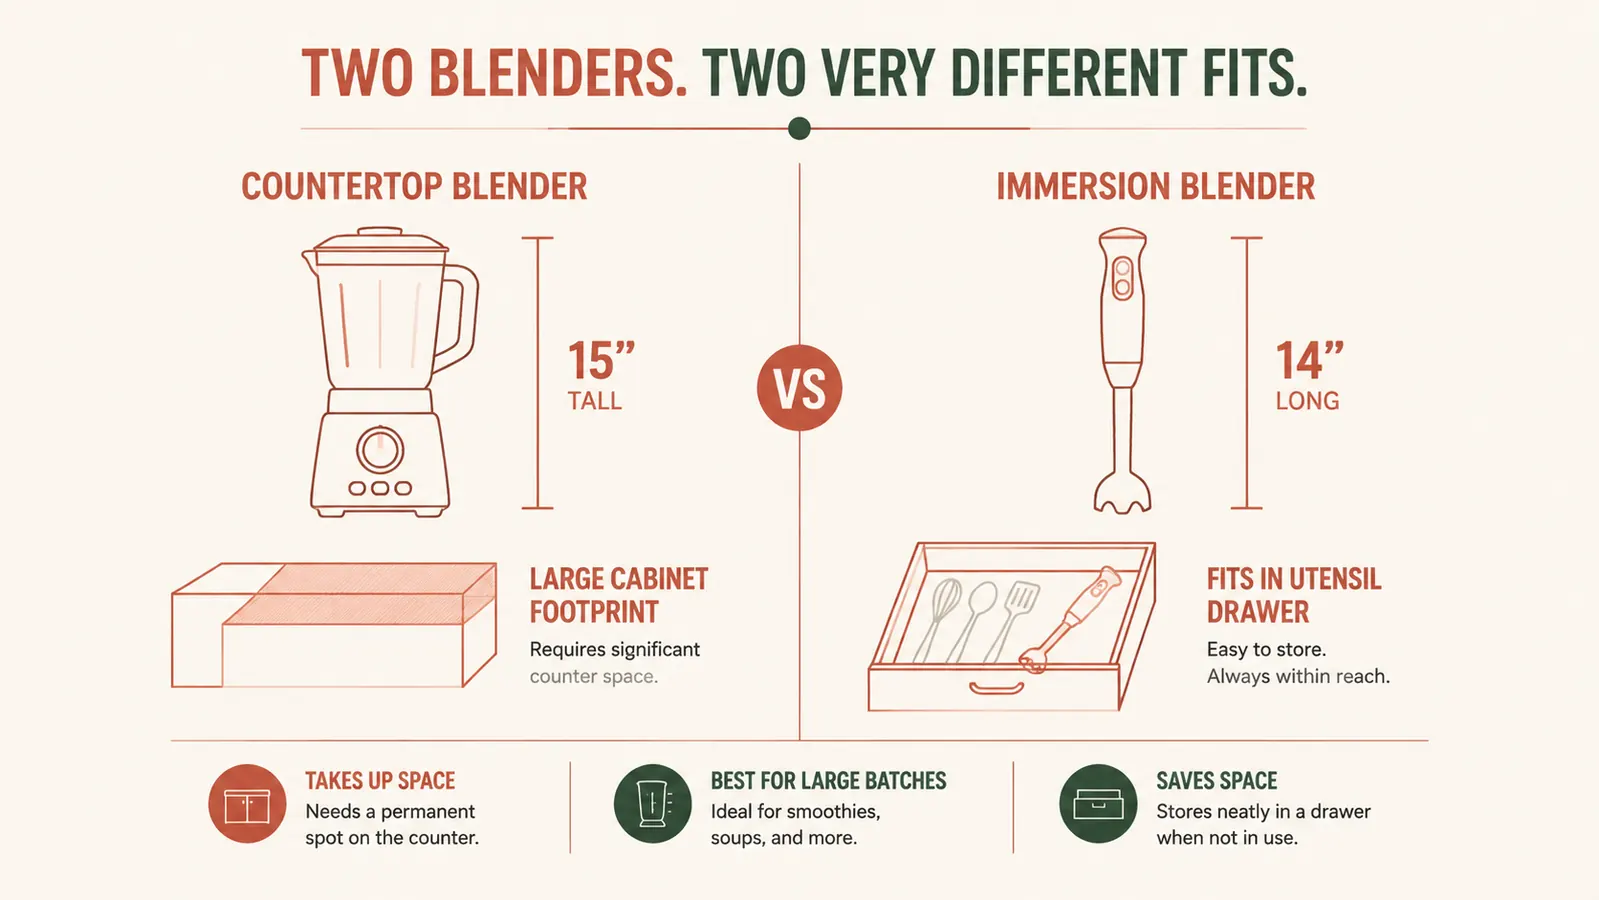
My old countertop blender lived on top of my refrigerator because there was nowhere else to put it. Getting it down involved clearing the cabinet above the fridge, balancing it on a step stool, and then finding a twelve-inch stretch of counter to park it on while I worked. That was not a workflow. That was an obstacle course. I made soup less often than I wanted to because the blender logistics were exhausting.
Then I switched to an immersion blender. Specifically, the Mueller Ultra-Stick 500W, which stores in my utensil drawer between my fish spatula and my silicone tongs. The countertop blender went to Goodwill. My soups did not get worse. They got better, because I actually make them now. This guide is everything I have learned about getting real, restaurant-quality results with a hand blender in a tight kitchen.
No counter space for a blender tower? This is the tool that replaces it.
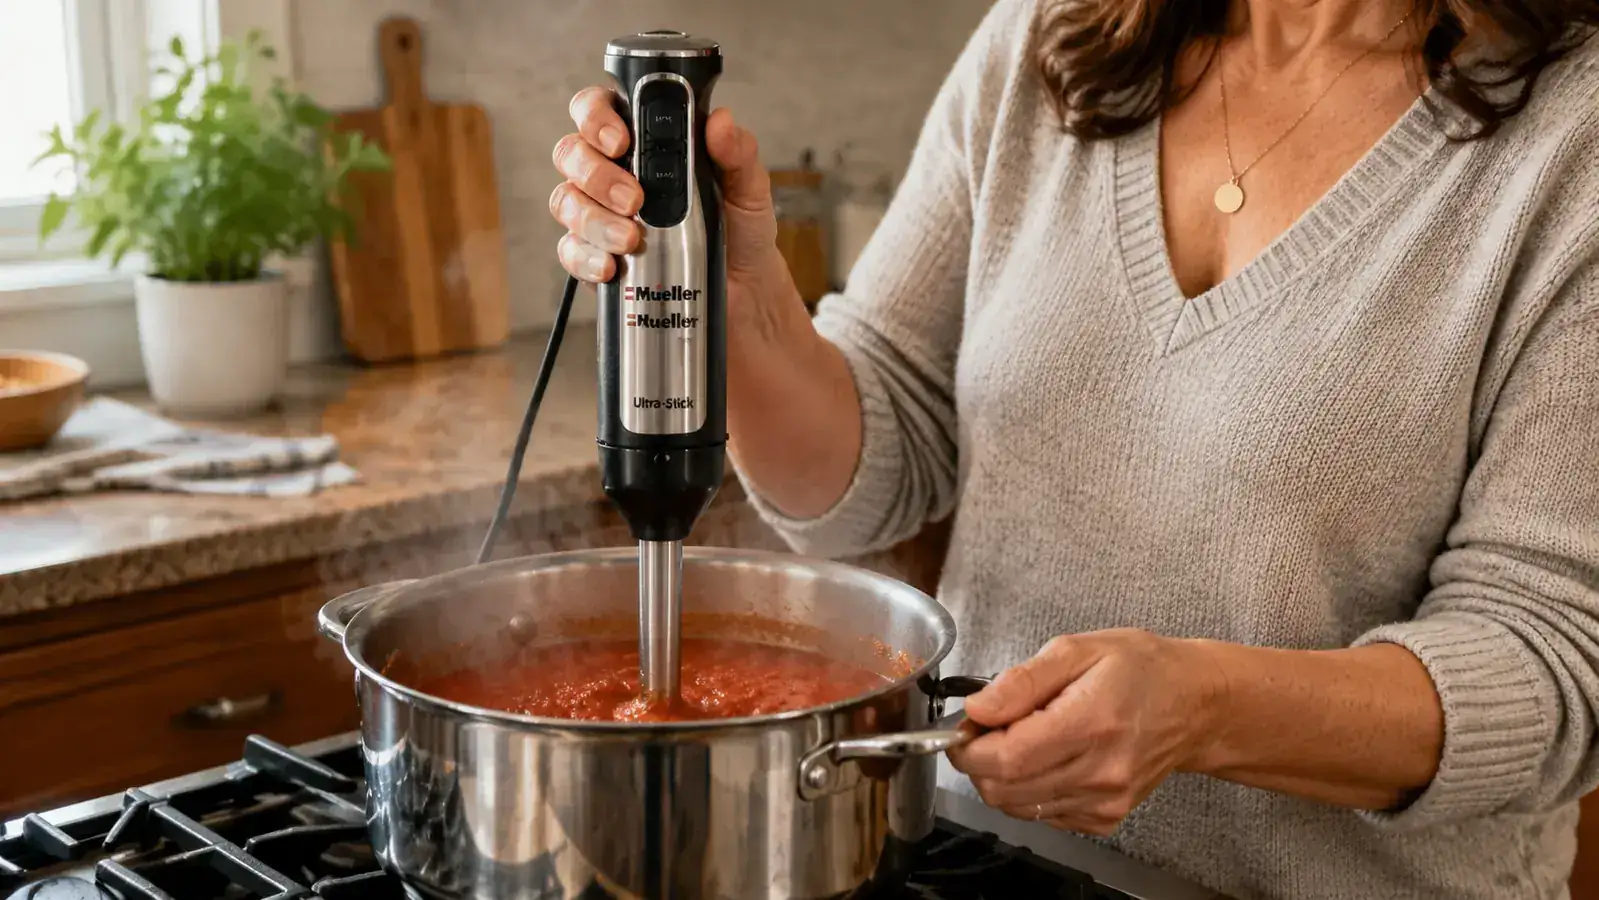
The Mueller Ultra-Stick 500W immersion blender stores in a utensil drawer, blends directly in the pot, and rinses clean in seconds. Rated 4.4 stars across more than 51,000 reviews.
Amazon Check Today's Price on Amazon →Step 1: Understand What an Immersion Blender Can and Cannot Do
Before you start blending, set expectations correctly. An immersion blender excels at soups, sauces, purees, smoothies in a tall cup, whipped cream, and emulsified dressings like mayo or vinaigrette. For anything that needs sustained high-speed processing of very hard or frozen ingredients, a countertop machine has the advantage. You are not getting a frozen margarita from a hand blender. But for weeknight cooking in a small kitchen, the immersion blender handles ninety percent of blending jobs without leaving the stovetop.
The Mueller Ultra-Stick runs at 500 watts across eight speed settings, which is enough motor for cooked vegetables, canned tomatoes, cooked beans, and dairy-based sauces. The eight speeds matter more than most people expect. Low speed is for chunky, textured results; high speed is for silky-smooth bisque. I almost always start at medium and finish at high for thirty seconds.
One rule that prevents splatter in every use: submerge the blade head completely before you turn the motor on. If the blade breaks the surface while spinning, you will be cleaning soup off your ceiling. Start submerged, keep it submerged, and turn it off before lifting. This one habit removes ninety percent of the mess people associate with immersion blenders.
Step 2: Make Pureed Soups Directly in the Pot
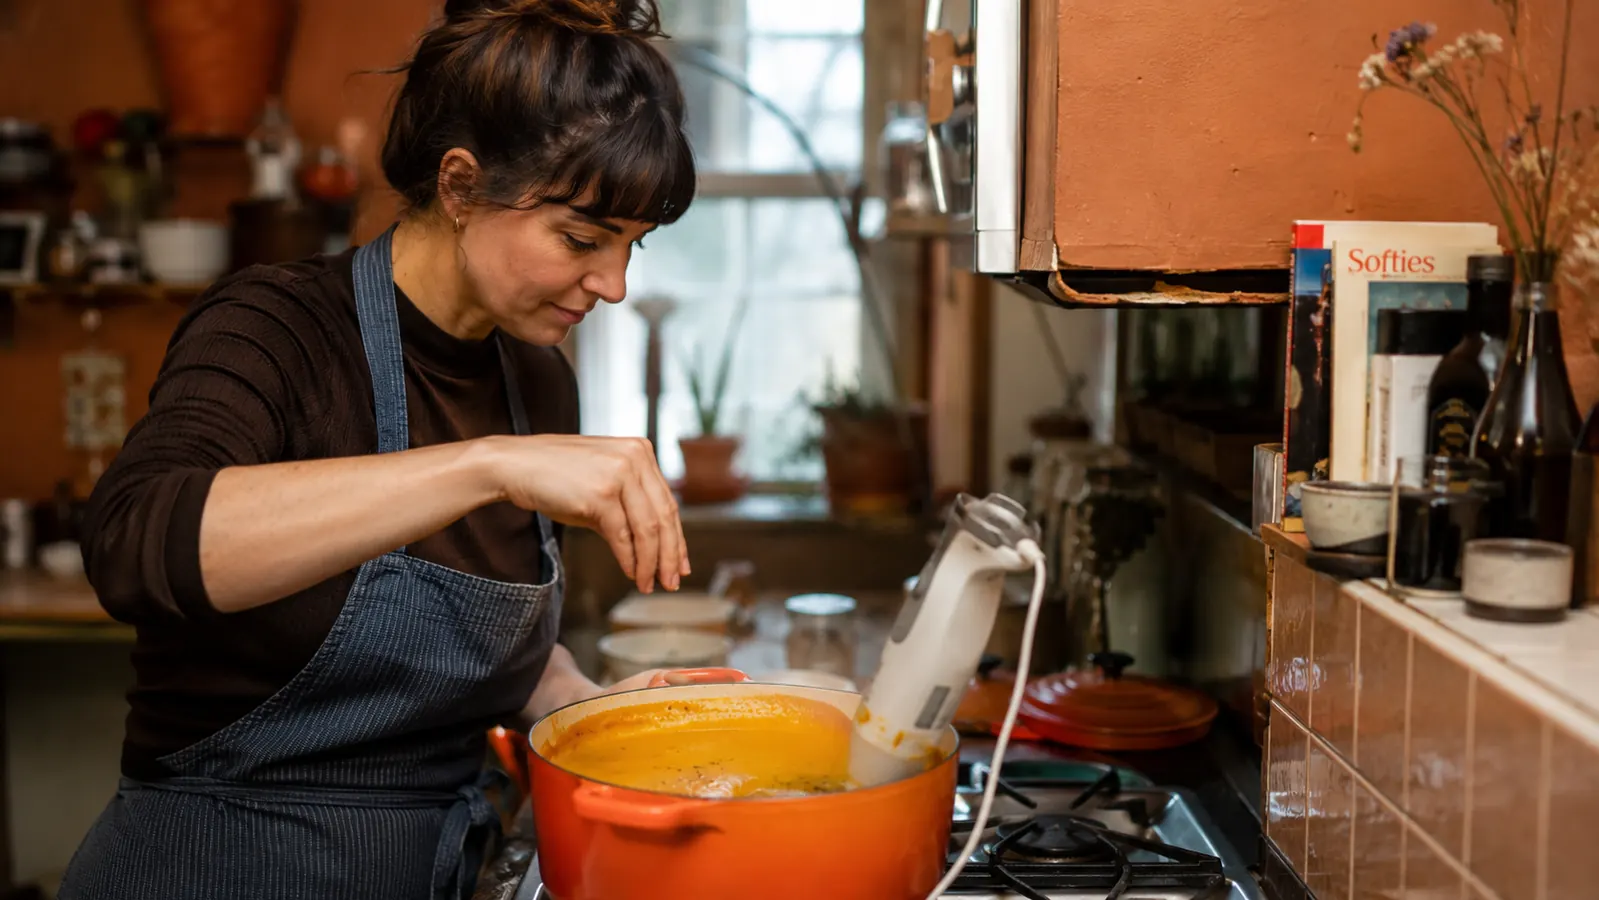
This is the core technique. You cook your soup in a Dutch oven or saucepan, let it simmer until the vegetables are completely soft, pull the pot off the heat for sixty seconds so it is no longer actively boiling, and blend directly in the pot. No ladling into a blender jar. No hot liquid steam-exploding the lid off. No second vessel to wash.
For a smooth butternut squash or sweet potato soup, cook the cubed vegetable in stock with an onion and a few garlic cloves until totally tender, about twenty-five minutes. Remove from heat. Submerge the Mueller's blade head, start at medium, then switch to high and move the blender in slow circles and up and down to catch all the chunks. Sixty seconds gets you a fully smooth consistency. Finish with a splash of cream if you want richness. Total pot-to-bowl time, including cooking: forty minutes. Washing the blender attachment takes thirty seconds under the tap.
For a chunkier result, like a rustic lentil soup or minestrone where you want some texture left, blend only half the pot. Submerge and blend one section, leave the rest intact. The unblended portion adds body and texture while the blended half thickens the broth. This is the trick I use most often because it produces a more interesting, layered result than either fully smooth or fully chunky.
Step 3: Build Smooth Sauces Without a Food Processor or Blender Jar
Tomato sauce, romesco, roasted red pepper sauce, pan sauces, and creamy pasta sauces all work beautifully with an immersion blender. The key for sauces is using a tall, narrow container rather than a wide pan to avoid splatter. I use a two-quart saucepan for immersion blending even when I started the sauce in a wider skillet. Just transfer the sauce into the saucepan, blend it smooth, and pour it back.
For a roasted tomato sauce, halve a pint of cherry tomatoes, drizzle with olive oil, roast at 400 degrees for twenty-five minutes until they collapse and caramelize at the edges, then transfer to a saucepan with a few torn basil leaves and blend smooth. The roasted flavor is incomparably better than stovetop cooked tomato sauce. Total active time is about eight minutes and the texture is as smooth as anything from a restaurant. This is not a technique I bothered with when I owned a countertop blender because the setup was too much trouble for a weeknight. The immersion blender made it casual.
For a cream-based sauce, like an Alfredo or a mushroom cream sauce, blend after adding the dairy to reduce the likelihood of separation. The emulsification step keeps the sauce glossy and restaurant-smooth rather than grainy. Run the Mueller at medium speed for about twenty seconds. Do not over-blend cream sauces or the fat can break.

Step 4: Emulsify Dressings and Condiments
Homemade mayo, aioli, and vinaigrettes are where the immersion blender does something no other small kitchen tool can do as effortlessly. Drop an egg yolk, a teaspoon of mustard, a squeeze of lemon, and a pinch of salt into a tall narrow cup (the Mueller comes with a beaker). Add a cup of neutral oil on top. Put the blade head at the bottom, turn it on high, and hold it still for ten seconds while the emulsion forms below the oil. Then slowly tilt the blender upward as the mayo forms and climbs. Start to finish: ninety seconds. Clean up: rinse the beaker and the blade.
For vinaigrettes, the same cup works. Add all ingredients, blend for fifteen seconds on medium. The result holds together far longer than a shaken vinaigrette and has a creamier, more cohesive texture. I make a batch every Sunday in the included beaker and store it in the fridge for the week. The beaker has a pour spout and a lid, so I store the dressing directly in it. One fewer container to wash.
The countertop blender was aspirational. I was going to make smoothies. I made smoothies maybe four times in three years. The immersion blender I use almost every time I cook because it solves real weeknight problems, not imaginary weekend ones.
Step 5: Handle Cleanup So It Stays Fast
The main reason people stop using any kitchen tool is a cleanup process that feels like a punishment. The immersion blender almost eliminates this friction. After blending, run the blade head under hot water for ten seconds while running the motor on low. That dislodges any food stuck in the blade guard. Follow with a drop of dish soap, pulse once more under running water, and rinse. Total time: thirty to forty-five seconds.
The Mueller's blade attachment is also dishwasher safe on the top rack, which means when you have the room in the dishwasher, zero manual washing. The motor body never goes in water, obviously, just wipe it down with a damp cloth if anything got on it. On most cooks, nothing gets on it at all because the blade assembly sits on a separate shaft. This separation of the messy part and the motor part is one of the thoughtful design details that makes the Mueller particularly suited to small kitchen workflows.
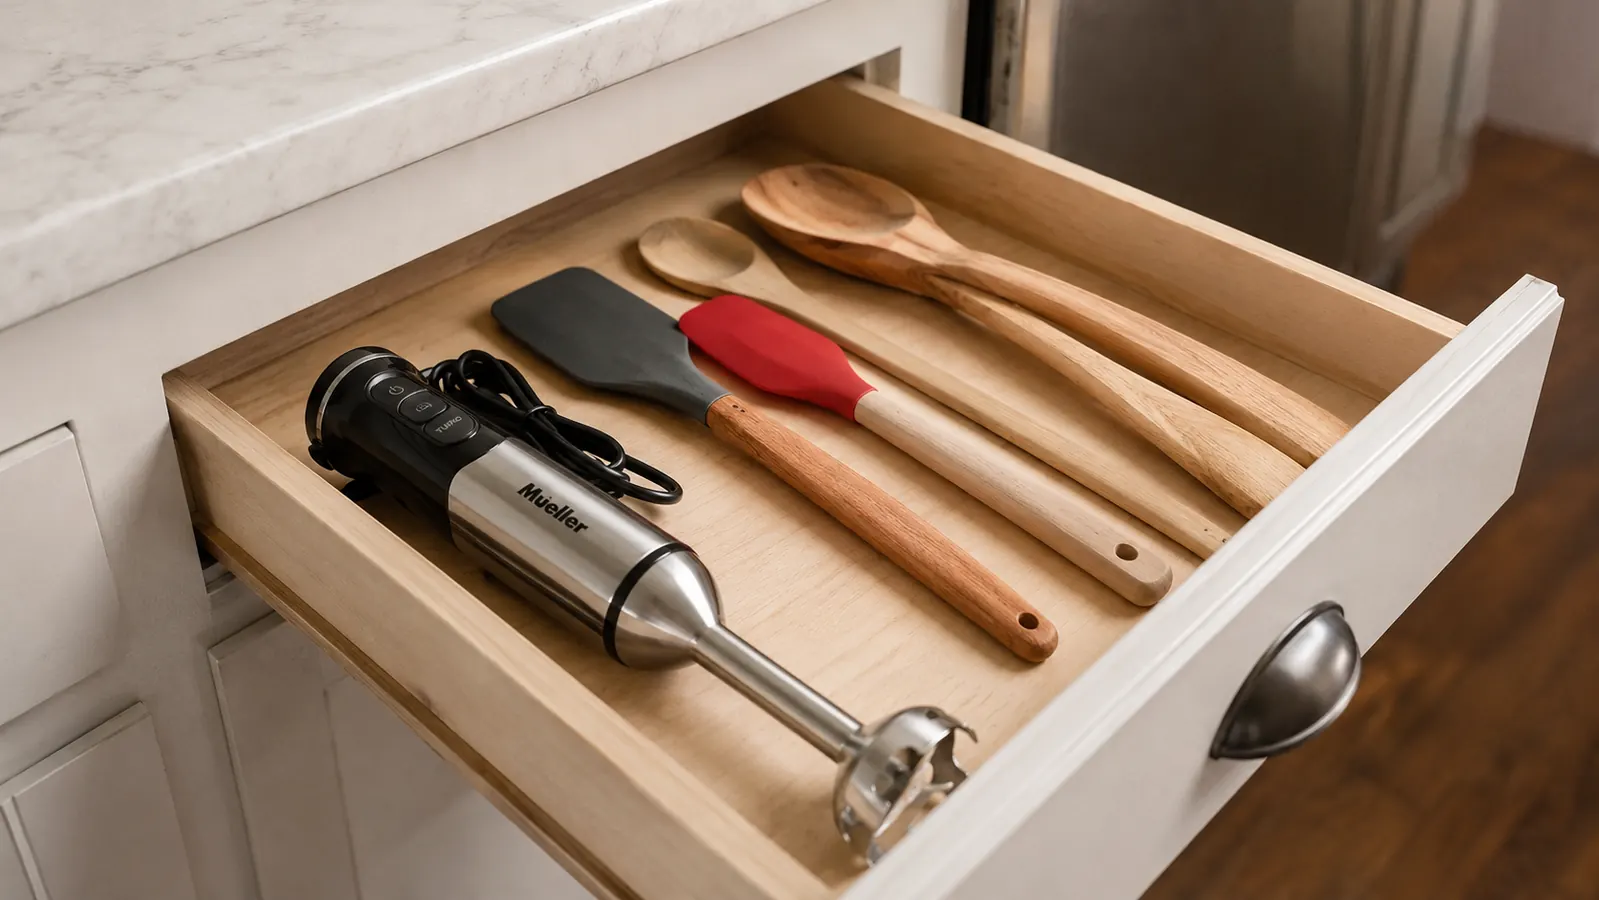
Store the blender in a utensil drawer or in a crock on the counter with your wooden spoons and spatulas. It is fourteen inches long and about one inch in diameter at the body. It takes up less drawer space than a ladle. The countertop blender, for comparison, took up a full cabinet shelf plus eleven inches of counter depth when in use. That is not a storage tradeoff. It is a transformation.
What Else Helps
A few supporting tools make the immersion blender workflow even smoother in a small kitchen. A tall, narrow saucepan with a pour spout is worth having specifically for blending tasks, since the straight sides prevent splatter better than a wide-bottomed Dutch oven for smaller batches. An oven mitt for holding the pot steady while blending is more important than it sounds, the pot can scoot around a gas burner if your cooktop surface is not flat. And a fine-mesh strainer, while not strictly necessary, adds a final silky pass to bisques or delicate sauces that need a restaurant-grade result.
The Mueller comes with a whisk attachment in addition to the blade, which handles whipped cream and eggs whites. I use the whisk for hollandaise, which sounds intimidating but is genuinely fast with a hand blender. The speed control on the Mueller, eight distinct settings rather than the typical two or three on budget models, gives you enough finesse to build the hollandaise emulsion slowly at first and finish it quickly without breaking the sauce. These details matter more in a small kitchen where every appliance needs to do multiple jobs to justify its drawer space.
Store it in a drawer, blend anything directly in the pot, and rinse it clean in under a minute.
The Mueller Ultra-Stick 500W immersion blender is the appliance Margo reaches for most in her Brooklyn kitchen. 8-speed control, dishwasher-safe blade, includes a beaker and whisk. 4.4 stars, 51,000+ reviews.
Amazon Check Today's Price on Amazon →